Windows 10 - Microphone Sample Rate Setup
Windows 10 - Microphone Sample Rate Setup
Microphone Sample Rate Setup - PC/Windows 10
Change the Sample Rate on Windows 10
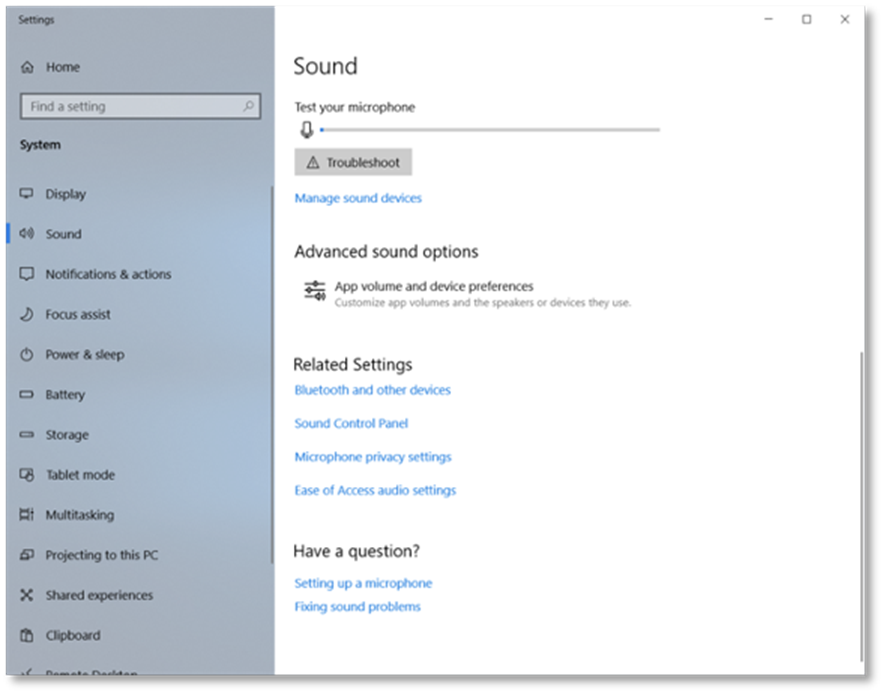
Right-click on the speaker icon in the lower-right corner of your desktop and click Open Sound Settings. In the Sound Settings panel select Sound Control Panel:
Right-click the Microphone (or the desired input option for the device) and select Properties.
Note: ensure that all Microphones have been enabled by right clicking and hitting Enable.Click the Advanced tab and change the Default Format to the drop down that records at 48000 Hz. Eg. 16-bit, 48000 Hz (DVD Quality):
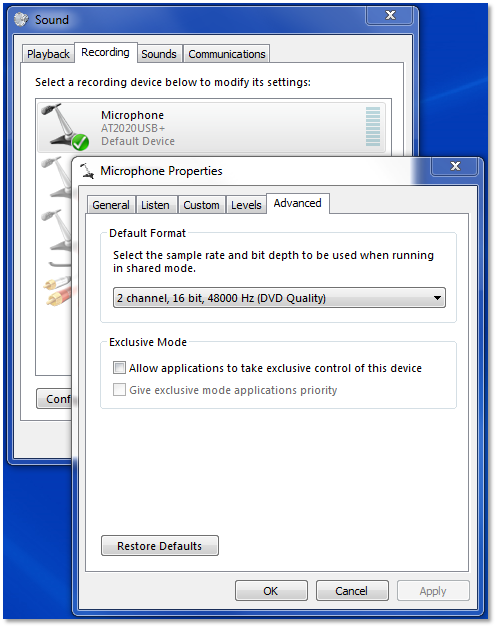
Ensure that both Exclusive Mode options have been deselected.
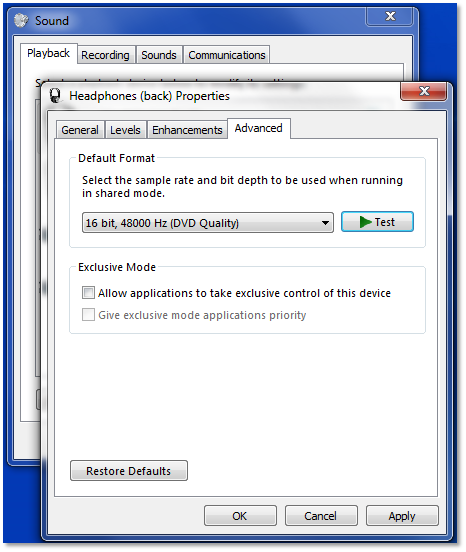
Click OK then click the Playback tab on the Sound window. Right-click on your default or desired output channel and choose Properties.
Ensure the Default Format option matches what you selected for your recording channel.
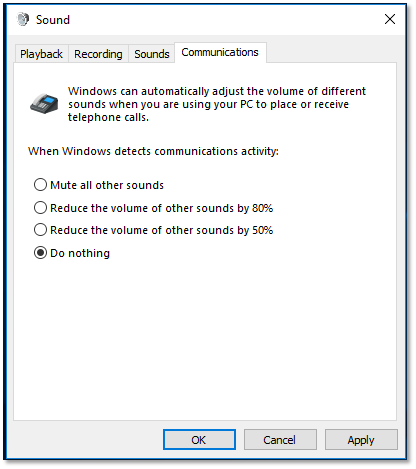
Your final step is to navigate to the Communications tab of the Sound window and select Do Nothing to ensure phone calls will not interfere with the recordings:
Click OK to save your settings.
Note: You must refresh the web page for the new changes to take effect.
![]() Last updated Sept. 5, 2022, 8:12 a.m. by Duncan Muggleton
Last updated Sept. 5, 2022, 8:12 a.m. by Duncan Muggleton
ZOOdubs
- Approved Microphones for ZOOdubs
- Location Services
- Mac/OS - Microphone Sample Rate Setup
- Mac/OS - Microphone Settings and Levels/Gain
- Mac/OS - Required Machine Specs
- Microphone Permission Required Failed
- Recommended Internet Speed for ZOOdubs
- Room Setup for Recording
- Updating Google Chrome
- Windows 10 - Microphone Sample Rate Setup
- Windows 10 - Microphone Settings and Levels/Gain
- Windows 7 & 8 - Microphone Sample Rate Setup
- Windows 7 & 8 - Microphone Settings and Levels/Gain
- Windows 7/8 & 10 - Required Machine Specs